Voice Acting Tech: Building a Vocal Booth
Want the know-how about building a vocal booth for a voice actor and/or vocalist? There are a number of tutorials available on the Web to various degrees of detail, but few if any are from the voice actor perspective specifically. Here is a detailed account of how I made mine, and how it’s been working out since:
* * *
Introduction
By now you’ve probably already reviewed the basic facts of my setup, and if you’re here you’re interested in the deeper details. Chances are you’re a voice actor and/or singer grappling with core questions like “build vs. buy” and/or “how much does something like this cost?” etc., so let’s briefly touch first on the preliminaries:
Build vs. Buy: This can be a bit misleading. I firmly believe when it comes to these things cost isn’t the biggest factor. For me, I purposely stuck with a portable booth to the point where
- The isolation wasn’t good enough anymore for my needs
- I needed something smaller (the portable I once used was big enough for 3 people), and
- I got into a space I knew I’d be staying in for a good while.
So keep such things in mind. If you’re renting and want to have the freedom to move to LA or NYC, even if you could, building a permanent booth may not be something to do yet. Additionally, think about how well the thing will pay for itself. If you’re not a regularly working voice actor, chances are you’re not ready to build a vocal booth. Remember, although it’s a crucial thing, there’s a lot more you need to get right than just making a nice dead room.
The Money Thing: A solid portable booth can run you hundreds up to a couple thousand dollars, easily. When I got one it was a used 5′ x 7′ WhisperRoom. For years, I loved it and got a lot of use out of it. Building a permanent vocal booth will run you a few thousand dollars, and can be done well for a total cost of $3-5K. It depends on the quality of the materials, also whether you do it all with your own hands vs. with the help of a contractor. If you hire a contractor, make sure they have great references. If/as you can make the vocal booth build part of a larger project and take as much of the planning on yourself, that will save you some money too. Be sure someone involved is clear on the process of getting all the legal clearances needed, as well. If you lack the proper permits from the city at job time and a neighbor calls them in, you’ll have to stop mid-way through and will get slapped with heavy fines. Lastly, I should note that our contractor, though this was his first time building a “serious” vocal booth, had made karaoke rooms before so he had some general comfort level and familiarity going in.
From here on, this write-up will assume you’ve made the decision firmly to try to build your own booth. I’ll try to cover all the essentials as I know them, even if not necessarily in any particular order.
Plan (for) the Surrounding Space

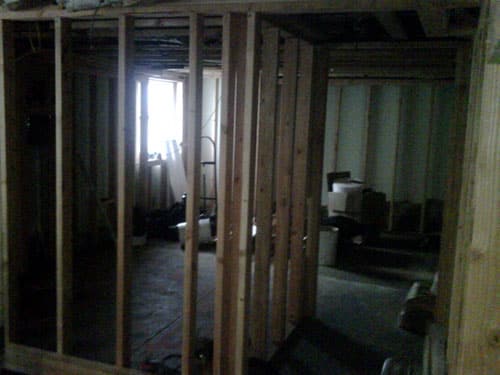
Planning is everything, so I did a lot of research before trying to dive into the planning stage. I made my booth as part of a larger downstairs renovation, so it rests within what’s now a small room that I use as my personal office and project studio, i.e. control room.
Consider the overall process of production. If you’re making a vocal booth at home, chances are you’ll be spending a good amount of time in front of the computer editing audio as well.
Make sure you put the booth in a place where it will make sense not just sonically, but process-wise. If you have to walk to the other end of the building simply to punch in a few retakes, that’s lame. If you’re doing overdubbing on multi-language projects but can’t view whatever you’re lip-synching to, also lame. At the very least, if not within the booth itself, there needs to be a monitor screen that you can easily glance up at and see outside the window. Imagine spending 30-60 minutes laying down takes and then stepping out for a break to find that, even though you could hear yourself the whole time, at some point your DAW’s buffer setting got maxed out and it stopped recording. What sucks is not that you now need to adjust your settings to free up some RAM in exchange for accepting a little latency. What sucks is that your killer reads just disappeared into the ether while you were performing unawares. Being able to, while performing, visually keep on top of your DAW – watching for any alert prompts that might suddenly appear upon application or system errors – is critical when you’re running a one-person operation. Some of this I’ve learned the hard way.
Having some space to work with is key, even for making a single-person booth. Because the walls are going to need to be thick, build your booth in a room where you’ll still have room for your desk and other furniture, also free floor space for doing things like untangling wads cables and junk.
Make sure you put your setup as far away from the usual “activity center(s)” of your home as possible. Remember, even if you build your booth well a small amount of the sound you make might still easily seep out if/as you’re belting it out. More importantly, when you have your mic hot you’ll still probably get some sound from outside the booth bleeding in if/as those sounds are loud.
Don’t put your vocal booth and surrounding space near bedrooms. I’ll explain this with another brief anecdote: I once sang in a band that was based out of a complex built specifically for bands to practice in, which was of course located in an industrial district. Normally, practice spaces aren’t recording spaces. Whenever we tried to make demo recordings we’d need to do it late at night to avoid our mics picking up our neighbors… Though we took pains to do our recording in the wee hours, one night through the wall we still ended up accidentally picking up the sound of some couple having an audibly intimate good time in a neighboring room. Naturally to make light of the interruption, within a few minutes we ran what we’d picked up of their sounds of passion through our sampler and then through the PA system to blast back at them at loud volumes, moreover so they could hear themselves played back across the whole range of pitch-shifting from “Darth Vader” to “Chipmunks”… The moral of the story is making good recordings means using sensitive microphones. Naturally it’s all easier said than done, but make every effort to put yourself in a spot where, ideally, others will be queit(ed) whereas you’ll have the option to be loud yourself (i.e. from your control room when you might find yourself trying to do mixing, working with background music and sound effects etc.).
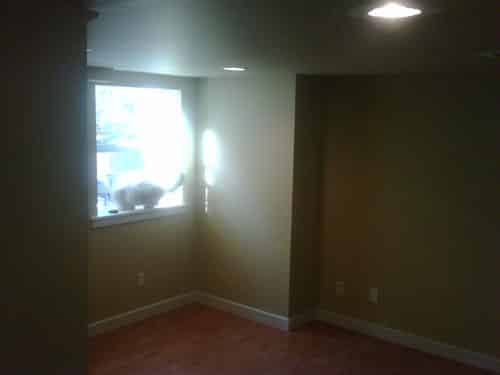
In our floor plan, my studio is located directly under our living room. It’s far from total isolation, but it’s what made the most sense in terms of my overall opportunity to locate (away from laundry machines, also not in any larger shared spaces that would’ve been harder to correctly build for and/or treat acoustically). At the time of this writing, my little one gets home from school in the early afternoon which means I do my recordings in the morning or at night. Realistically, when you build you should expect to have to make a few compromises no matter what. Bear in mind that not unlike nightclubs, some of the most famous and successful recording studios in the country still have to negotiate when they do certain things (to avoid upsetting the neighbors etc.).
Mass
Probably the single most important thing to keep in mind about sound isolation is mass, as that’s the only way to get good sound resistance. Note, sound resistance isn’t literally sound proof. Unless you can make yourself something bunker-like with a good deal of concrete involved, that’s technically not ever going to happen. My booth ended up being what I needed in terms of a nice dead space, where I could close the door and not have my mic pick up the noise of my computers and external hard drives. Note, modern computers and drives have gotten a lot quieter than they were 7-10 years ago. At the time of this writing (late 2009) I’m migrating from a 867MHz G4 QuickSilver (circa 2002) – a machine that was so noisy people would mod it to quiet it down – to a Mac Pro. The noise difference is remarkable.
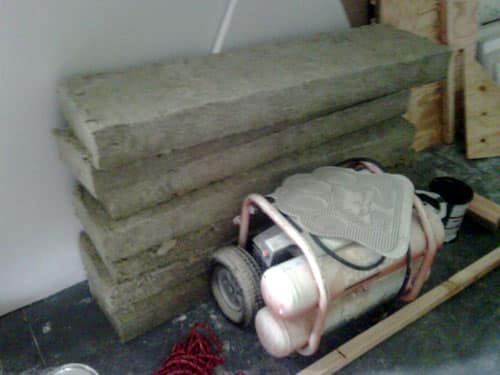
To put it very simply, thicker is better. If you can do like I did and make the walls 6″ thick, go for it. Make them a total of 4″ thick at minimum. Also, stagger the studs within the wall construction. Check out some of the details that the SAE Institute has put online. Regarding insulation, though I can attest to that it certainly helps block sound, I’m not a fan of filling walls with sand. Aside from the mess of construction (and it is always messy), conceptually I find it’s a little scary. Sand can get very heavy, and throughout your walls’ and ceiling’s construction you’ll need to make sure the frame you make will be able to support what you fill it with, also however many layers of MDF/drywall/gypsum you use.
Some people use the “pink stuff” but I suggest go with something more suited to sound-stopping specifically. You many need to hunt around a bit. For what I used, we had to go through a vendor who normally sells in bulk to the military, whose lots tend to be protected by armed guard (U.S. Marshalls), so we had to sign statements swearing that we weren’t using it to build bombs etc.
Acoustics
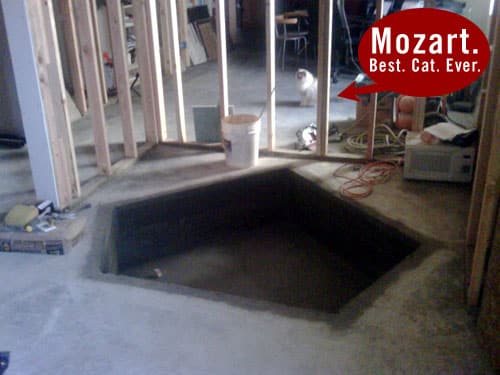
Make the walls non-parallel to minimize how much sound bounces around within the room. Make sure the ceiling is neither too low nor high, i.e. with a solid 16″ or more of head room. If less than 12″, boxiness becomes a potential problem. If you add too many feet of headroom the opposite will happen: You’ll get more ambience. I made my studio in a pseudo-basement area which had a low ceiling. For my control room it wasn’t a problem but for my vocal booth, it required digging down 2 feet into the foundation to ensure that the internal space would be tall enough for an occupant of my height (6’1″). This part was probably the hairiest point of the project.

So today, my booth basically sits in a shallow pentagon-shaped pit we cut in the floor. Make sure you map out where all your pipes are and aren’t if you have to do something like this, and determine in advance if they’ll need to be reconfigured.
Regarding trying to get “deadness” in the end product, as with everything else here this is just my opinion and tastes, but I think a good vocal booth can’t be too dead. The first time you step into it should feel strange at first; kind of creepy when you hear yourself talk and then give it a clap test. Keep in mind here that when Engineers and Producers get an audition in as submitted by any given voice actor trying for whatever gig, this is one of the things they’re listening for, not just a full and well articulated sound. You know how much of what makes music work is the space in between the notes, as much as it is the notes themselves? It’s kind of like that. When a voice actor sends stuff out, the quality of it is judged both by what can and can’t be heard.
For foam on the walls, I’ve found 2″ wedges along with bass traps in the back corner works great. I covered the walls, the ceiling and the inside of the door. For the floor, after all the layers of gypsum and rubber/fiber were laid down, adding a layer of high pile carpet was critical. Once you have a nice dead booth, if you don’t have carpet on the floor you’ll still end up with problematic “thoonk-clump” type sounds when you move your feet around. Even if you just shift your weight from foot to foot, if you’re using a proper mic, those vibrations will get picked up as noise. Carpeting puts an end to that, and is probably even more important if your mic isn’t overhead-mounted.
For ventilation, decide carefully. My previous portable booth had a system which I almost never used. When it came time to make a permanent booth, I added none. To get the best seal I could I chose to make a room that would be air-tight, using acoustic caulk throughout the construction.

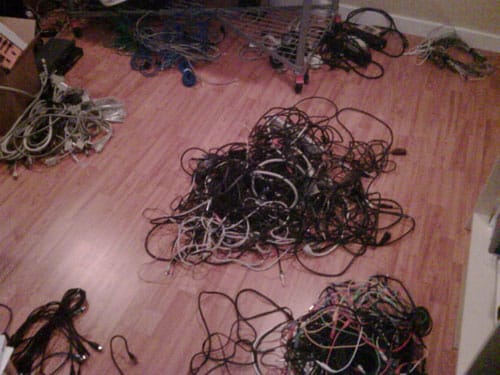
I run my cables through small holes drilled in one wall, secured with rubber stoppers with small holds in the middle. You can get those from hardware stores, chemistry shops, also wine making / beer brewing supply shops. Of course, this made my vocal booth a potential death trap for pets and small children, also something that can’t be used for too long without taking breaks (especially if a performance is vigorous). I keep my studio locked when not in use, and when I’m in my booth I make sure to not stay in it for hours on end. It’s not a problem, and I have the peace of mind of knowing that I’ve one less thing to worry about re. trying to keep my sound inside and the world’s outside.
Electricity
I put dimmers in my control room and my vocal booth because like a lot of “creative” people I find that working in low lighting helps the process. I didn’t know it at the time, but these can sometimes cause problems with recording, introducing unwanted noise. So far I haven’t had any problems, but in retrospect I still wish I’d been aware of how quirky environmental factors can be with audio recording. I’ve also started to become more sensitive to the fact that I live not too far from a large radio tower which could potentially cause electromagnetic interference. Though making a recording studio will tend to involve more fundamental things like grounding and power conditioning, consult an electrician if you need to in making decisions about what needs to happen within your booth. In these areas, sometimes certain mics just won’t work well in certain situations so try to be conscious about what happens with your power planning.
Closing Thoughts, The Spec & More Related Links
Expect the whole process to be a dirty one no matter what. It creates a ton of dust, and protecting people and possessions from that is one of the biggest safety concerns. Also, try to keep on schedule in light of the month or more of downtime that will be involved. Assuming you’re not in LA or another place casting directors from NY or Chicago may converge annually to get a break from the cold winters back in their respective hometowns, around the holiday season may the best time to undertake something like this so as to minimize impact on your ability to accept work.
* * *
All in all, luckily for me the whole thing worked out OK. It wasn’t the most inexpensive way to go, but I absolutely am glad that I got help. I hold my own in the software world much more than I do in the hardware world, so just as your results will at least slightly vary your choices along the way will too.
Obviously this article isn’t meant to cover all that it could, but those are what have been the most important items in my experience. Hopefully I didn’t leave any fundamentals out… So with no further ado, feel free to download the initial spec I wrote up for the booth by clicking on the link below (Note: Twitter or Facebook account required).
DISCLAIMER: That’s just the draft I submitted during the initial planning, and doesn’t totally reflect the final implementation. A few glaring mistakes I made in the beginning were corrected before the work started. Had we built exactly as I’d initially drafted we’d have ended up with something too small; too much like a phone booth / coffin lovechild. In the end product, from my initial draft we
- increased the available interior space by 10-15%
- reworked the ceiling joists plan to make the weight supportable, and
- didn’t go floating all throughout the construction for full “cushy,” i.e. we floated the booth as a unit but within that unit didn’t float the ceiling and floor apart from the walls.
by SysOp ![]()